Palo Alto NAT configuration
5 Step configuration of a NAT on Palo Alto
Covers:
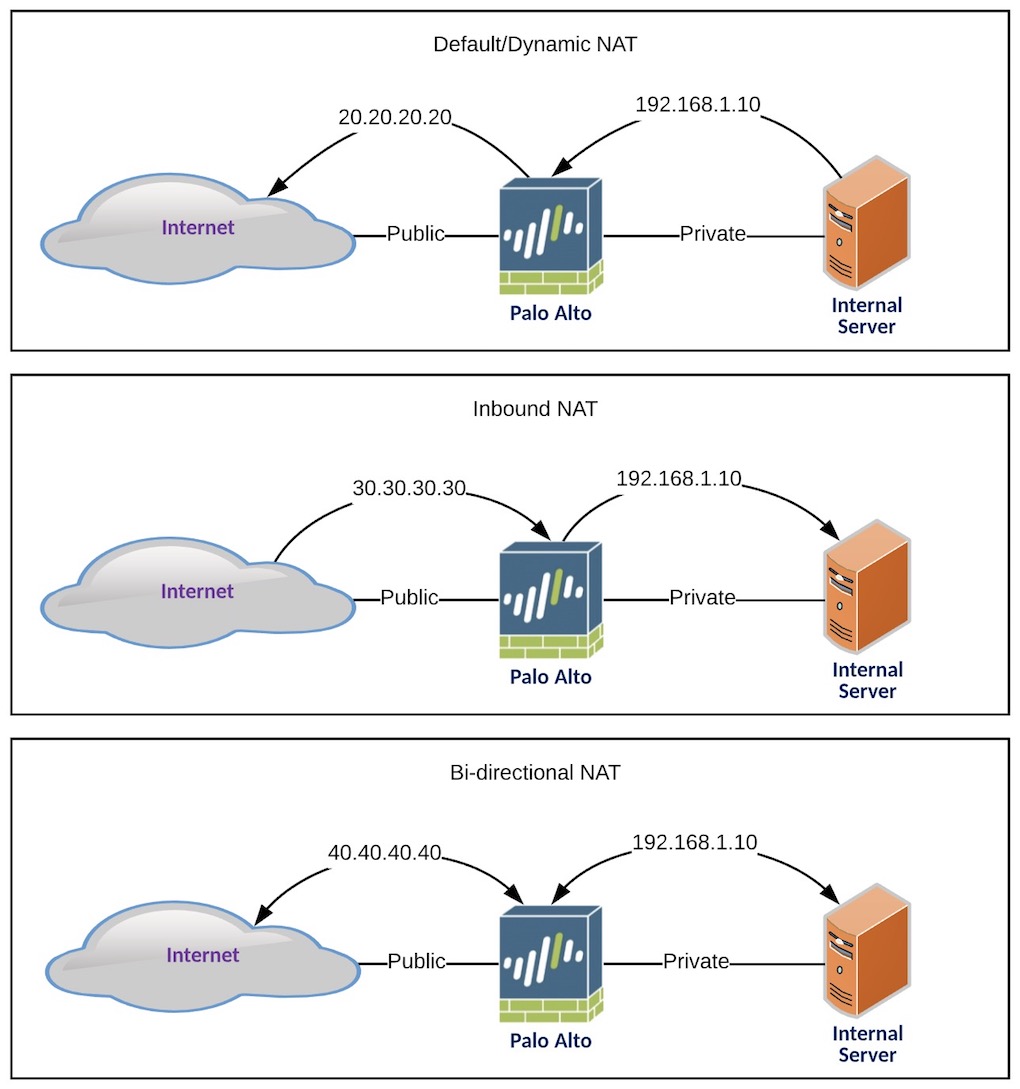
- Default/Dynamic NAT (Inside > Outside) - [Many to One]
- Inbound NAT (Outside > Inside) - [One to One]
- Bidirectional NAT (Outside > Inside or Inside > Outside) - [One to One]
IMPORTANT: Please remember to add approrpiate policies to permit traffic between Zones. Example for Inbound NAT: Allow Untrust Zone to have acess to Trust Zone from Any IP to Specfic Server IP address and any associated applications/ports.
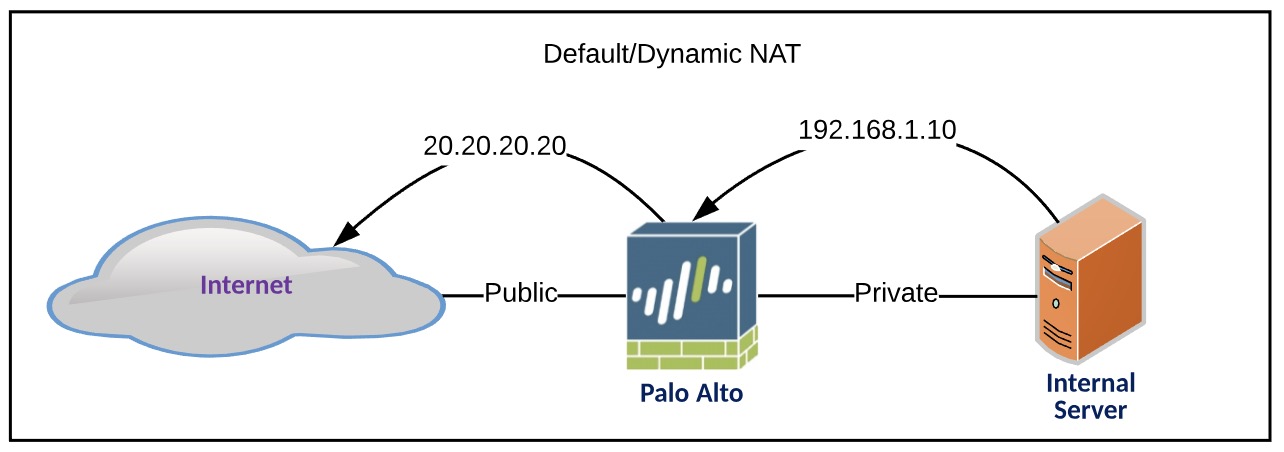
Default/Dynamic NAT
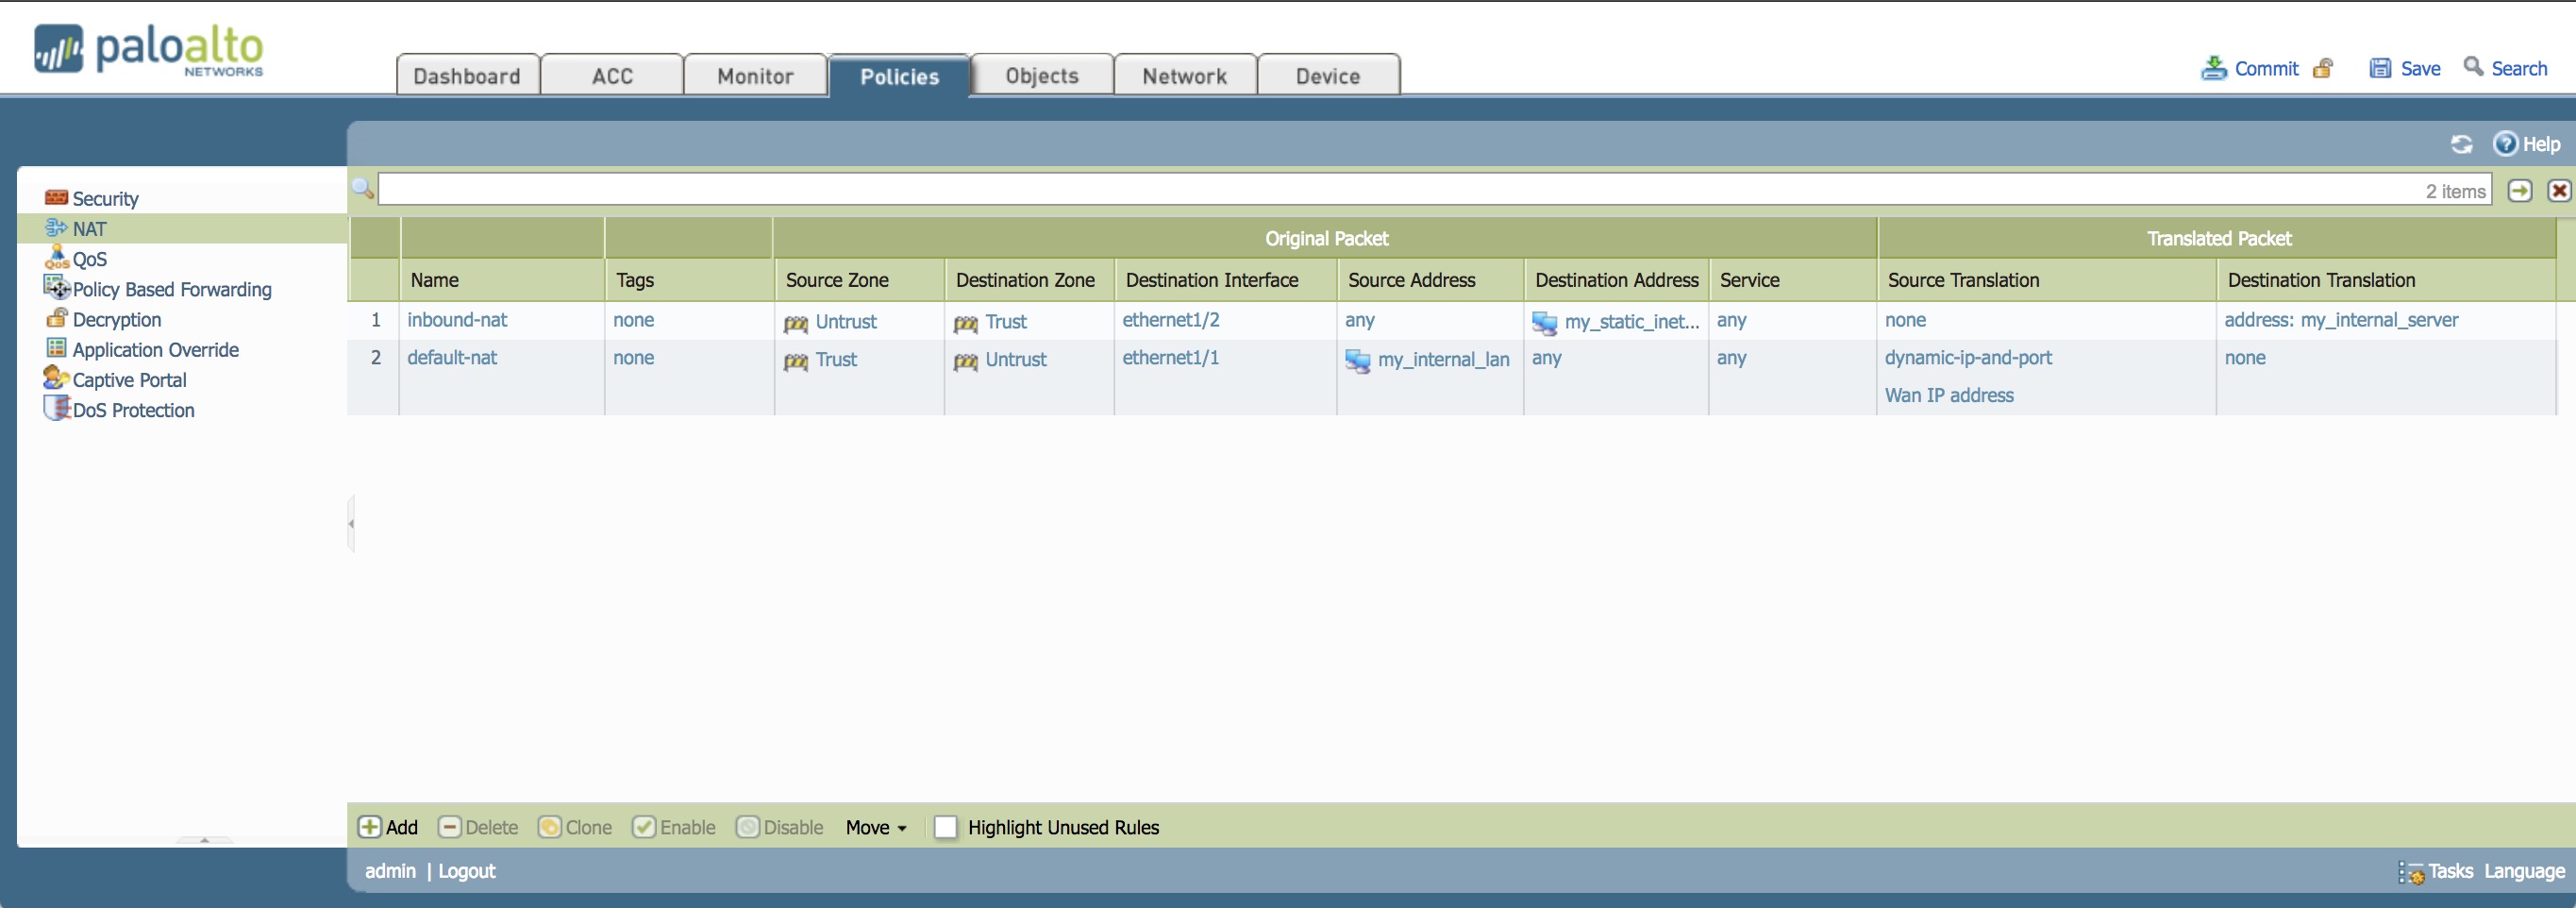
This nat configuration will NAT the entire LAN network [192.168.1.10/24] to a singular IP address [20.20.20.20] when going out to the Internet.
- Navigate to
Policies>NATthen click the+ADDbutton at the bottom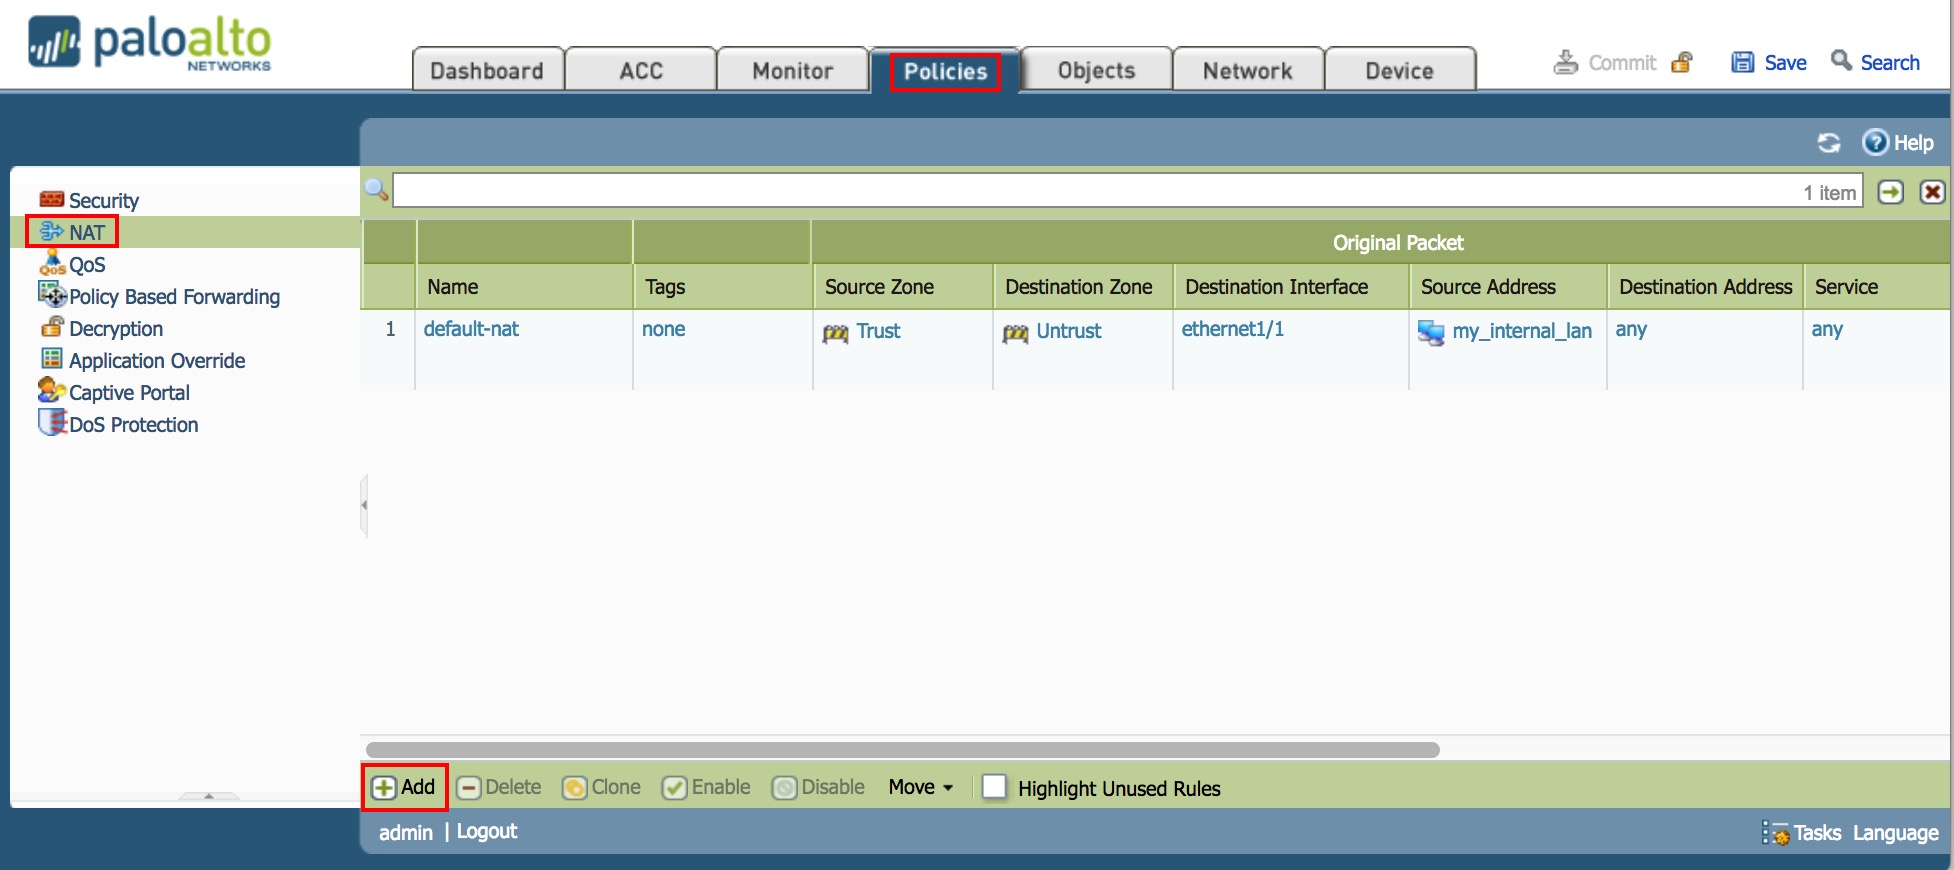
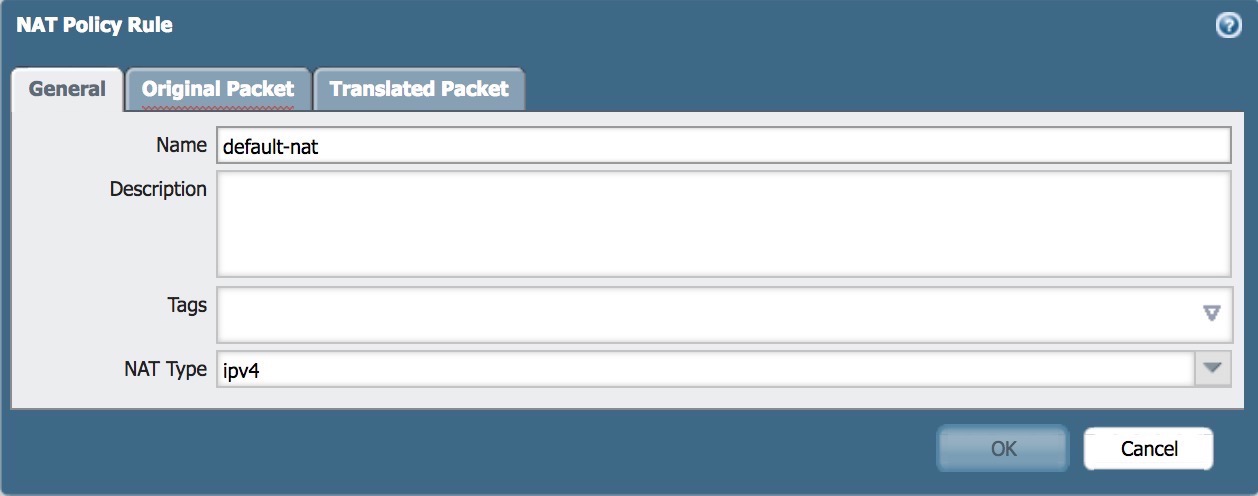
- Enter Name of Default NAT Policy
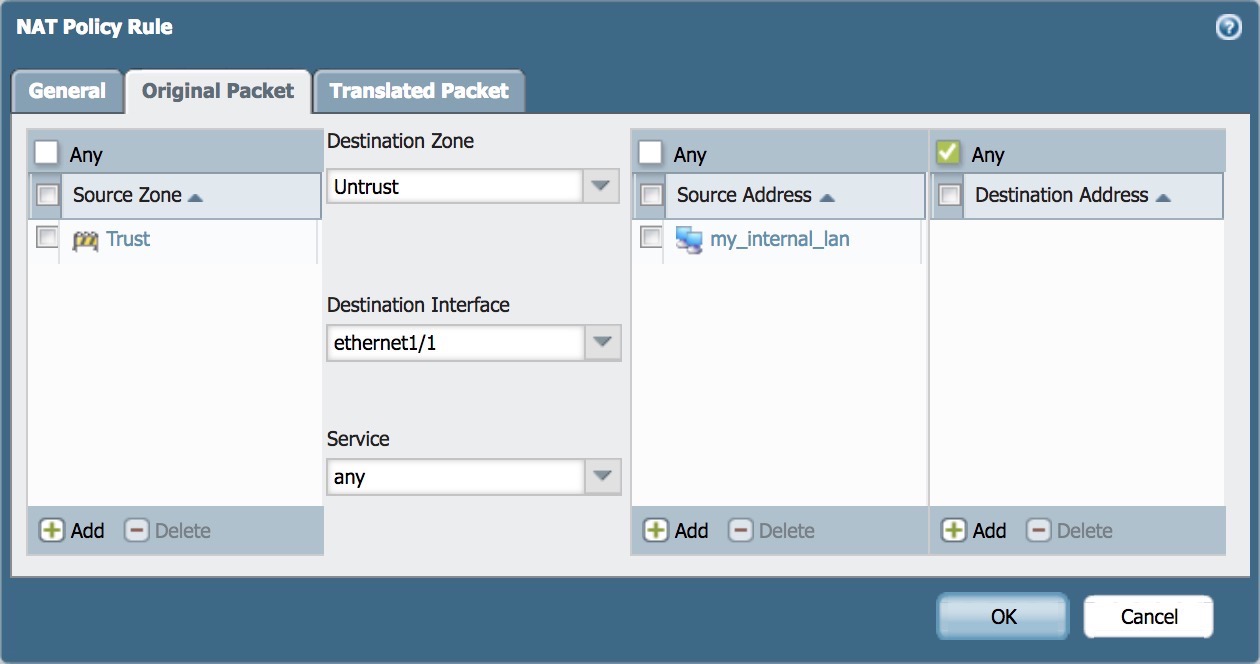
- Fill in Source Zone, Destination Zone, Destination Interface, Source Addresses
- Source Zone: Zone which traffic will originate
- Destination Zone: Zone which traffic will go to
- Destination Interface: Interface which traffic will go to
- Source Address: IP or Subnet that of which initiates the traffic
- Under Source Address Translation, select in the dropdown
Dynamic IP and Portand add the desired IP address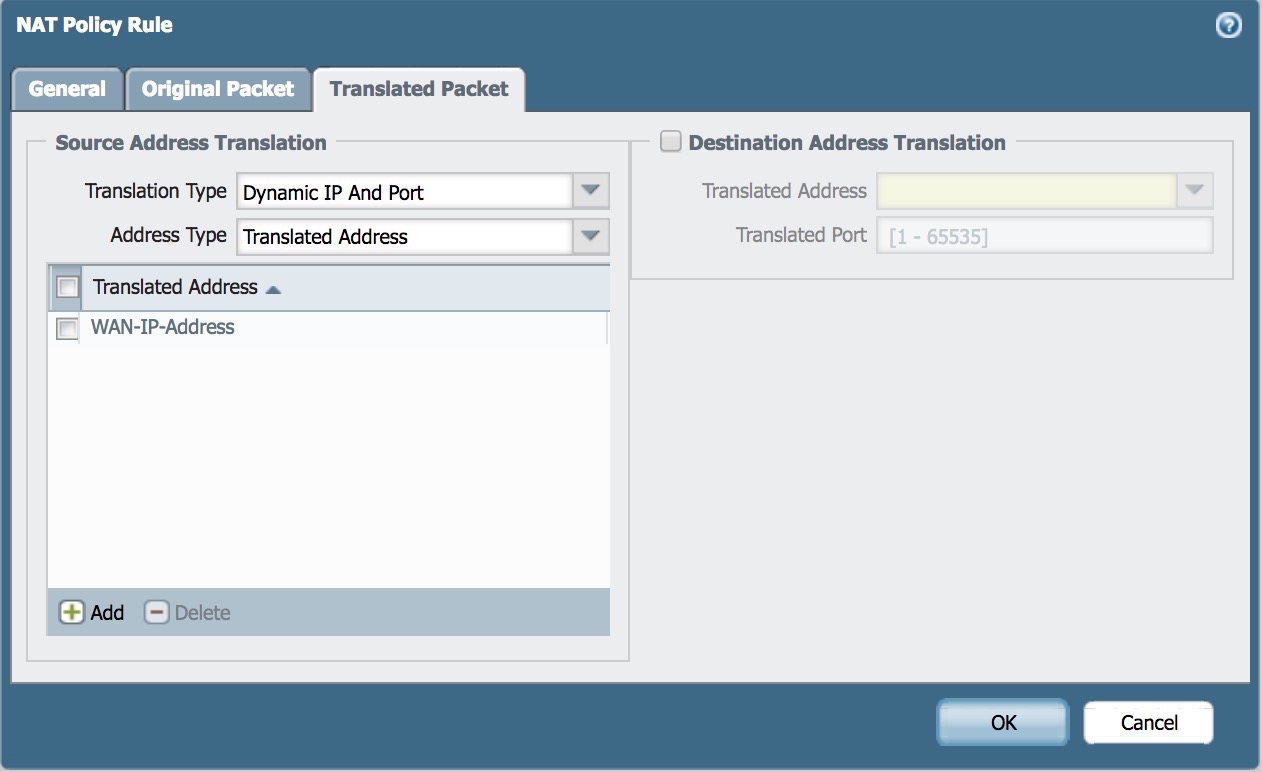
- Default NAT policy completed

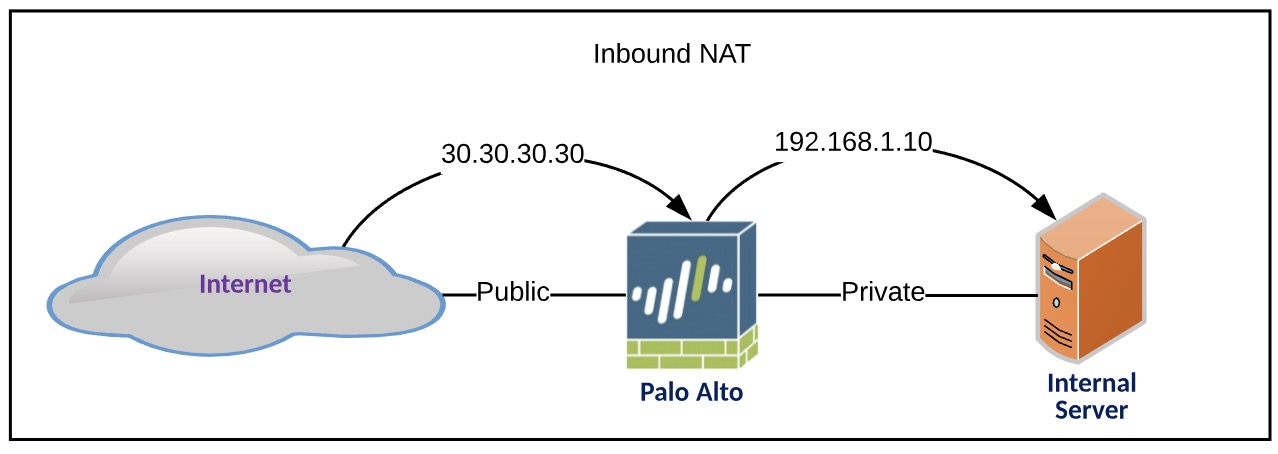
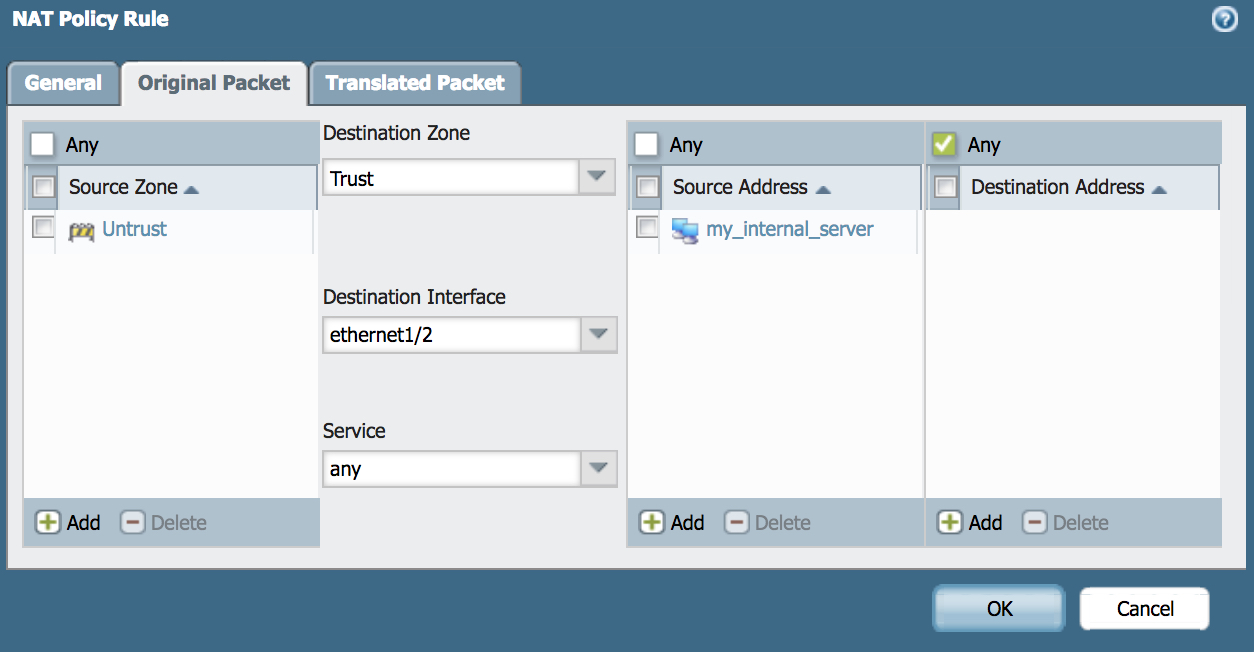
Inbound NAT
This NAT configuration allows users from the Internet to hit a public IP address [30.30.30.30] and the traffic would be routed to your desired server[192.168.1.10]. An example of this would be hosting a webpage in your network and allowing clients from the internet to connect to it.
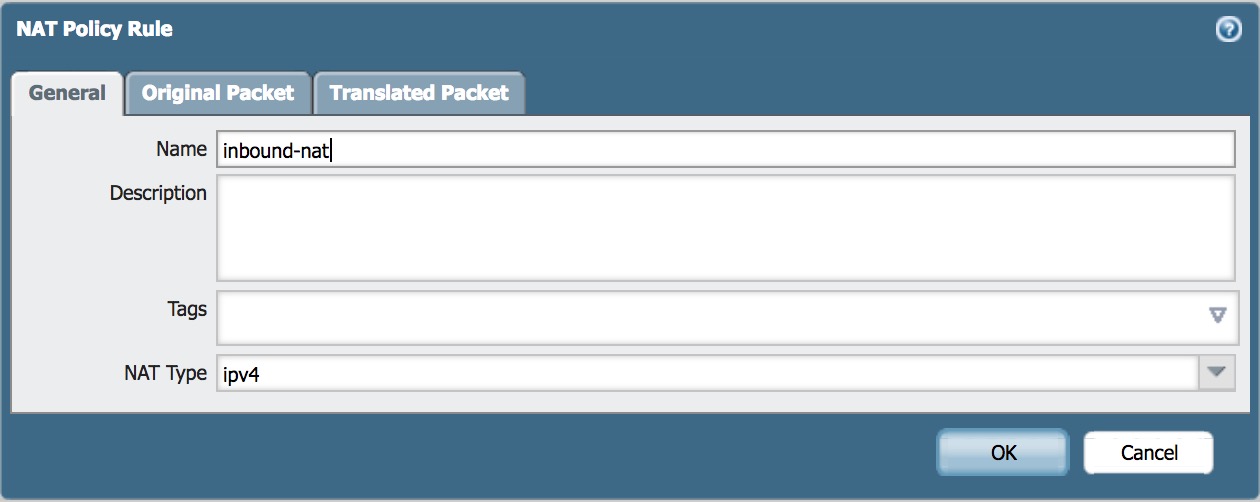
- Navigate to
Policies>NATthen click the+ADDbutton at the bottom - Enter Name of Inbound NAT Policy
- Fill in Source Zone, Destination Zone, Destination Interface, Destination Addresses.
Note: This is a simple example of two zones. If you are exposing a device to the Internet, it would be best security practice to keep it isolated in an alternate zone such as a DMZ.
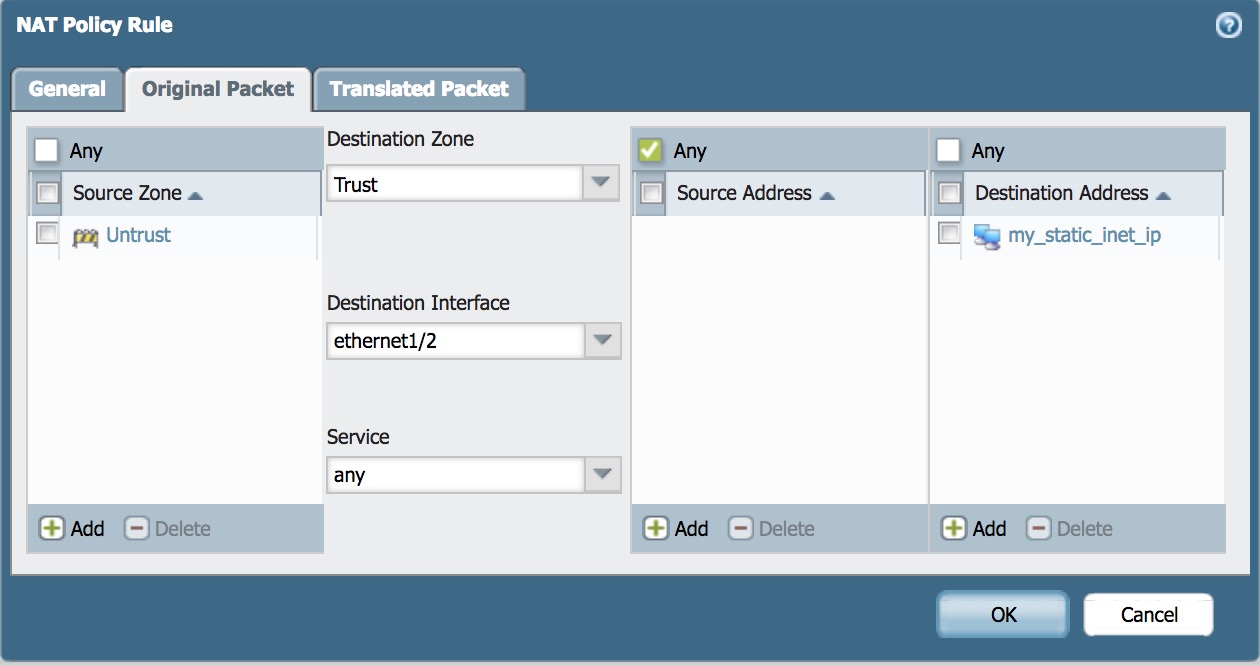
- Check the box
Destination Address Translationand in the drop down, select the destination server. In this case, I want users from the Internet to be able to access “my internal server”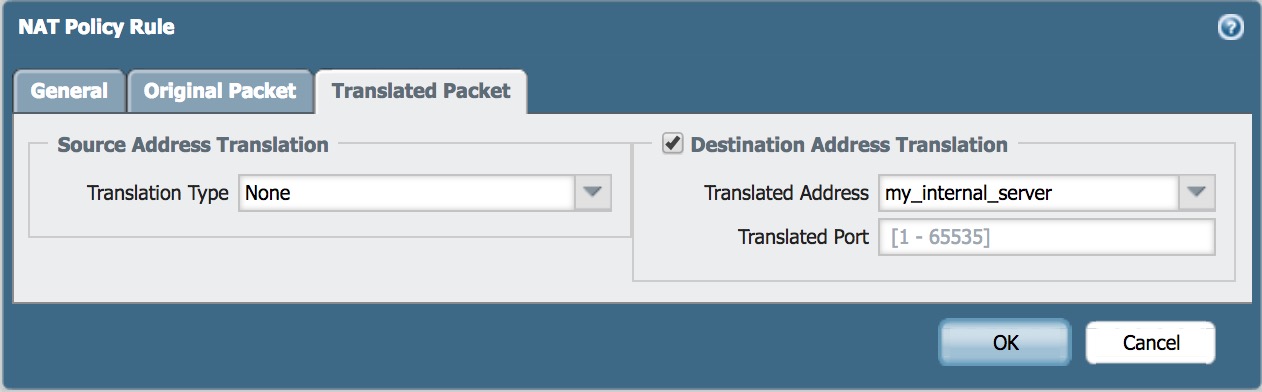
- Inbound NAT policy completed
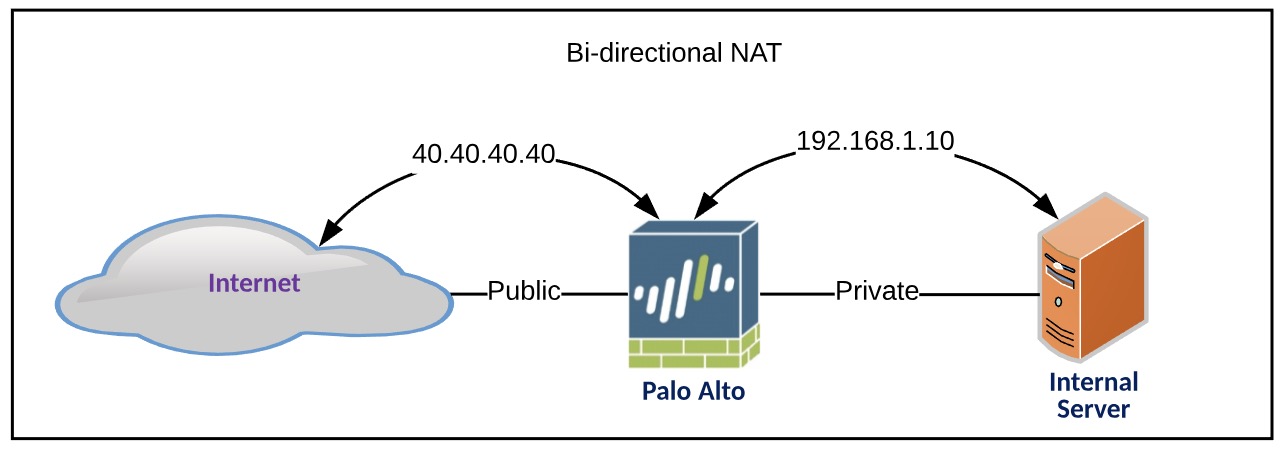
Bi-directional NAT
This NAT configuration allows access to an internal server [192.168.1.10] to a designated Internet IP [40.40.40.40] and in the same way, the traffic going out to the Internet from that internal server, appears as the same designated Internet IP.
- Navigate to
Policies>NATthen click the+ADDbutton at the bottom - Enter Name of Bidirectional NAT Policy

- Fill in Source Zone, Destination Zone, Destination Interface, Source Addresses
- Under Source Address Translation, select in the dropdown
Staticinput the desired Static Public IP address, and ensure that you check theBi-directionalbox
- Bidirectional NAT policy completed

Hopefully this has helped you understand NAT on the Palo Alto better.
If you find any errors or have suggestions to improve this article, please feel free to contact Jon at blog@tekrx.ca
All applications mentioned in this article are not endorsed by TekRx Solutions and are to be used at your own discretion. TekRx Solutions does not take responsibility for any liability in the use of any application mentioned in the article.